Time - Create, Read, Store, Manipulate
Status: Incron and chrony's server part still missing.
Last changed: Saturday 2015-01-10 18:32 UTC
Abstract:
This page is about time with regards to Debian e.g. setting the local timezone, installing NTP (Network Time Protocol) software or scheduling tasks at certain times. For example, this page tells about cron. Cron is short for Chronograph. It is a time-based scheduling service in Unix-like computer operating systems. Similar to cron is Anacron. It is a computer program that performs periodic command scheduling which is traditionally done by cron, but without assuming that the system is running continuously. Also time-based but not executing commands periodically is at. The at command is used to schedule commands to be executed once, at a particular time in the future. While cron, anacron and at/batch are tools which execute commands when a certain time has been reached, Incron is a new tool modeled after cron which executes commands when a filesystem event occurs -- without polling, Incron can watch a specific file or an entire directory for various activities such as new files, file writes, closures, deletions etc.
|
Table of Contents
|

He asked me if I knew what time it was — I said yes, but not right now.
— Steven Wright
This subject (time) is so loaded of myths and legends like no other.
If we just visit some random webforum and search for things like
timezone, cron, ntp etc. then it usually does not take long until we
wrinkle our forehead and start scratching our heads because of all the
weird information that can be read there. Well, I guess, in the end,
for the most part, this is because places like webforums are mostly
visited by novices — that is perfectly fine however; anyone needs to
begin at zero at some point.
Finally, I decided to take one item off my to do list i.e. write an
article to blow away all the myths and legends with regards to time so
that something trivial also appears as such and therefore can be
understand by anyone. Note that this page however does not discuss
time with regards to programming, I have information about this on
another page.
Cron
Even though this section walks us through cron related subjects in a
linear manner, reading man 8 run-parts, man 8 cron , man 1 crontab as
well as man 5 crontab is certainly a good idea — however, if I were
new to the whole subject, I would probably read through this article
and take a look at the manual files afterwards.
Many pieces of system administration can be automated via perl or
shell scripts which run at regular intervals. For example we might
have a script to check if our HDD (Hard Disk Drive) is full (however,
I would rather recommend using Nagios) which runs once every hour,
informing us if there are shortages ahead.
The most common mechanism for scheduling commands on Unix systems is
via the cron package. This allows users to schedule arbitary
commands to run at arbitary times with regular frequency (those who
want to run arbitary commands at arbitary times but just once may take
a look at at). In Debian the cron package is installed as part of the
base system, and will be running by default. Cron, as supplied in
Debian, has two main purposes:
- to run system jobs on a hourly/daily/weekly/monthly etc. basis
and/or
- to allow users to setup their own schedules
Basics
- What is Cron?
-
Cron is a daemon used for scheduling tasks to be executed at a certain
time. Each user (e.g. mine which is
sa) has a crontab file,
allowing them to specify actions and times that they should be
executed.
- What Is Crontab?
-
There is also a system crontab, allowing tasks such as log rotation
and locate database updating to be done regularly. A crontab is a
simple text file that holds a list of commands that are to be run at
specified times. These commands, and their related run times, are
controlled by the cron daemon and are executed in background.
- Use
-
There are two main areas with Cron also known as triggering actions
based on time — per-user and system-wide. More on that further down
...
Files and Directories
The system schedules are set up when the cron package is installed, via
the creation of some special directories and files as can be seen below:
Administer
/etc/cron.allow/etc/cron.deny
crontab, the command (man 1 crontab), is the program used to install,
deinstall, edit or list the crontables (man 5 crontab) used to drive
the cron (man 8 cron) daemon. Each user can have his own crontab
table, and though these are files in /var/spool/cron/crontabs, they
are not intended to be edited directly but instead crontab -e should
be used.
If the /etc/cron.allow file exists, then a user must be listed therein
in order to be allowed to use the crontab command. If the
/etc/cron.allow file does not exist but the /etc/cron.deny file does
exist, then a user must not be listed in the /etc/cron.deny file in
order to use the crontab command.
If neither of these files exists (default), then depending on
site-dependent configuration parameters, only root will be allowed to
use the crontab command, or all users will be able to use it. For
standard Debian systems, all users may use the crontab command.
If the -u option is given (e.g. crontab -u sa -e), it specifies the
name of the user whose crontab is to be tweaked. If this option is not
given, crontab examines our (the user listed with whoami) crontab.
System wide
/etc/cron.d/etc/cron.daily/etc/cron.weekly/etc/cron.monthly/etc/crontab
Except for the first and last one which are special, these directories
allow scheduling of system-wide jobs in a coarse manner. Any script
which is executable and placed inside them will run at the frequency
which its name suggests. For example if we place a script inside
/etc/cron.daily it will be executed once per day, every day.
The time that the scripts run in those system-wide directories is not
something that someone typically changes, but the times can be
adjusted by editing the file /etc/crontab. The normal manner which
people use cron is via the crontab command (man 1 crontab). This
allows us to view (-l), remove (-r) or edit (-e) our crontab file,
which is a per-user file (see below) containing entries describing
commands to execute and the time(s) to execute them.
/etc/cron.d
Cron treats the files in /etc/cron.d as in the same way as the
/etc/crontab file (they follow the special format of that file, i.e.
they include the user field). However, they are independent of
/etc/crontab i.e. they do not, for example, inherit environment
variable settings from it.
The intended purpose of this feature is to allow packages that require
finer control of their scheduling than the
/etc/cron.{hourly,daily,weekly,monthly} directories to add a crontab
file to /etc/cron.d. Such files should be named after the package (or
user; see below) that supplies them. Like any other crontab file, the
files in the /etc/cron.d directory are monitored for changes.
- In practice:
-
Instead of adding a line to
/etc/crontab which Markus knows is not a
good idea (see below), Markus might well add a file to /etc/cron.d with
the name suno, containing his tasks. This would not be affected by
updates but is a well known location.
-
Now, when and why would we use these alternative crontab locations
instead of user crontab files? Well, on a single user machine or a
shared machine such as a school or college server, a user crontab
would be the way to go. However, in a large IT department, where
several people might look after a server, then
/etc/cron.d is probably
the best place to install crontabs —
it is a central point and
saves searching for them!
However, usually, we may not need to look at /etc/crontab or
/etc/cron.d at all, let alone edit them by hand. But an experienced
user should know about them and that the packages that he installs may
use these locations for their crontabs as well as it may be used for
the above reasons where several people look after one server.
/etc/crontab
Debian's standard crontab file looks like this
sa@sub:~$ cat /etc/crontab
# /etc/crontab: system-wide crontab
# Unlike any other crontab you don't have to run the `crontab'
# command to install the new version when you edit this file
# and files in /etc/cron.d. These files also have username fields,
# that none of the other crontabs do.

SHELL=/bin/sh
PATH=/usr/local/sbin:/usr/local/bin:/sbin:/bin:/usr/sbin:/usr/bin

# m h dom mon dow user  command
17 *    * * *   root    cd / && run-parts --report /etc/cron.hourly
25 6    * * *   root    test -x /usr/sbin/anacron || ( cd / && run-parts --report /etc/cron.daily )
47 6    * * 7   root    test -x /usr/sbin/anacron || ( cd / && run-parts --report /etc/cron.weekly )
52 6    1 * *   root    test -x /usr/sbin/anacron || ( cd / && run-parts --report /etc/cron.monthly )
#

sa@sub:~$
As can be seen, it ends with some blank line plus it actually does not
contain any per-user settings put only pointers to specific
directories. This is best practice because either do we put scripts
into /etc/cron.daily and friends or use crontab -e to create per-user
cron jobs that can be individual (times, commands, etc.) Just imagine
what /etc/crontab would look like if any user would put his cron jobs
there, not to mention, the increase in complexity of ensuring per-user
cron jobs, their setup, maintenance etc.
Since /etc/crontab is the base crontab that applies system-wide, we
need to specify what user to run the job as — thus, the syntax is:
m h dom mon dow user command
It is recommended, however, that we try to avoid using /etc/crontab
unless we need the flexibility offered by it, or if we would like to
create our own simplified anacron-like system using run-parts for
example. For all cron jobs that we want to have executed under our own
user account or root, we should stick with crontab -e to edit
per-user cron jobs rather than editting the system-wide /etc/crontab.
If our machine is regularly switched off, we may also be interested in
at and anacron, which provide other approaches to scheduled tasks. For
example, anacron offers simple system-wide directories for running
commands daily, weekly, and monthly. Scripts to be executed in said
times can be placed in /etc/cron.hourly, /etc/cron.daily,
/etc/cron.weekly and /etc/cron.monthly.
One should not get confused over the fact that both, cron and anacron,
use the afore mentioned directories i.e. /etc/cron.daily,
/etc/cron.weekly and /etc/cron.monthly. The idea behind a combined
cron/anacron setup is that, if both, cron and anacron, are installed,
then anacron gets to run the scripts in those three directories (why
anacron does not bother about /etc/cron.hourly can be read within the
anacron section below). If anacron is not installed then cron runs the
whole shebang as can be seen from /etc/crontab.
All scripts in each directory are executed as root (non-root users
cannot use anacron), and a specific order to running the scripts can
be specified by prefixing the script's filenames with numbers. For all
the scripts that we put inside the afore mentioned directories, we
need to be aware of some limitations.
Per-User
There is one directory containing all per-user crontab files which in
turn contain per-user cron jobs.
/var/spool/cron/crontabs/*
List
crontab -l is used to display a users crontab file. root can view any
users crontab file by adding -u <username>, like for example crontab
-u sa -l would list the contents of sa's crontab file i.e.
/var/spool/cron/crontabs/sa.
Edit
crontab -e can be used to edit a users crontab file. It will launch
our default editor upon a user specific crontab file (creating it if
necessary). When we save the file and quit our editor it will be
installed into the system unless it is found to contain errors.
If we wish to change the editor used, we can do so by editing the
EDITOR environmental variable like shown in line 3 below. If we are
not satisfied we can unset it again as can be seen in line 6.
1  sa@sub:~$ echo $EDITOR
2
3  sa@sub:~$ export EDITOR=`which emacs-snapshot-gtk`
4  sa@sub:~$ echo $EDITOR
5  /usr/bin/emacs-snapshot-gtk
6  sa@sub:~$ unset EDITOR
7  sa@sub:~$ echo $EDITOR
8
9  sa@sub:~$
Remove
crontab -r removes a users crontab file from the system. crontab -i
actually is the same as -r but prompts the user for approval before
removing his crontab file.
Format
The format of these files is fairly simple to understand. Each line is
a collection of six fields separated by spaces. The fields are
(starting left):
- The number of minutes after the hour (0 to 59)
- The hour in 24 hour format (0 to 23)
- The day of the month (1 to 31)
- The month (1 to 12)
- The day of the week (0 to 7 or name e.g. Sun; 0 and 7 determine Sunday)
- The command to run
More graphically they would look like this:
m     h    dom   mon   dow  Command to be executed
|     |     |     |     |
|     |     |     |     +----- Day of week (0-7)
|     |     |     +------- Month (1 - 12)
|     |     +--------- Day of month (1 - 31)
|     +----------- Hour (0 - 23)
+------------- Min (0 - 59)
Each of the fields is separated by a space, with the final field
(number six) possible containing one or more spaces as in command#1 &&
command#2. No spaces are allowed within field 1 to 5 itself, only in
between them.
Each of the first five fields contains numbers —
mon and dow may also
contain names; we have to use the first three letters of the
particular day or month, case does not matter e.g. sun, Mon, jul, Feb
would work. Ranges or lists (see below) made out of names are not
allowed.
The first five fields may be entirely replaced with @ commands (see
below). If we do not use numbers, names or @ commands, fields can be
left as * characters to signify any possible value for this particular
field (e.g. 0,1,2,3,4... 58,59 for the first field (m)).
Example including a Username
Below is an image to demonstrate an example of how a cron command
might look like. Note that this example also includes a username (root
in this case) which, as we know, is normally not necessary with
per-user crontabs.

Miscellaneous
This section is used to collect various sub-subjects of cron.
Time{,zone}
- Cron acts with regard to ones local timezone — if we have an
environment variable called
TZ set to a different timezone, it will
use that timezone instead of the one copied to /etc/localtime; yes,
we could actually provide cron with a different local timezone as
the one used for the rest of the system. However, I would not
recommend this since chances are high we shoot ourselves in the
foot by fiddling around with this kind of thing (see man 1
tzselect, works only temporary i.e. for current shell session)
sa@sub:~$ cat /etc/timezone
Europe/Vienna
sa@sub:~$ echo $TZ

sa@sub:~$
- Special considerations exist when the clock is changed by less than
3 hours, for example at the beginning and end of daylight savings
time. If the time has moved forwards, those jobs which would have
run in the time that was skipped will be run soon after the change.
Conversely, if the time has moved backwards by less than 3 hours,
those jobs that fall into the repeated time will not be re-run.
- Only jobs that run at a particular time (not specified as
@hourly,
nor with * in the hour or minute specifier) are affected. Jobs
which are specified with wildcards are run based on the new time
immediately.
- Clock changes of more than 3 hours are considered to be corrections
to the clock, and the new time is used immediately.
Restarting Cron
Also, tons of legends and myths go with this one. Why not take a look
at man 8 cron... For the impatient: Cron need not be restarted
whenever a crontab file is modified. Please do not directly edit
crontabs but use crontab -e.
[skipping lines...]

cron then wakes up every minute, examining all stored crontabs,
checking each command to see if it should be run in the current
minute. When executing commands, any output is mailed to the owner of
the crontab (or to the user named in the MAILTO environment variable
in the crontab, if such exists). The children copies of cron running
these processes have their name coerced to uppercase, as will be seen
in the syslog and ps output.

Additionally, cron checks each minute to see if its spool directory’s
modtime (or the modtime on /etc/crontab) has changed, and if it has,
cron will then examine the modtime on all crontabs and reload those
which have changed. Thus cron need not be restarted whenever a crontab
file is modified. Note that the crontab(1) command updates the modtime
of the spool directory whenever it changes a crontab.

[skipping lines...]
Logging
Cron logs its action to the syslog facility cron, and logging may be
controlled using the standard syslogd facility (see man 8 syslogd). To
alter cron's verbosity at run time, -L loglevel can be used.
The standard logging level (1) will log the start of all the cron
jobs. A higher loglevel (2) will cause cron to log also the end of all
cronjobs, which can be useful to audit the behavior of tasks run by
cron. Logging will be disabled if the loglevel is set to zero (0).
Syntax
| Specifier |
Meaning |
| a |
At a |
| a,b,c |
At a, b and c |
| a-b |
From a to b |
| * |
first to last |
| a-d/x |
From a to d with steps of x. 1-9/2 is the same as 1,3,5,7,9. */15 * * * * determines every 15 minutes; 0 */23 * * * determines every 23 hours; etc. |
Instead of the first five fields, one of eight special strings may
appear i.e. all of the following @ commands can appear in place of the
first five fields.
| String |
Meaning |
@reboot |
Run once i.e. at startup |
@yearly |
Run once a year i.e. 0 0 1 1 * |
@annually |
same as @yearly |
@monthly |
Run once a month i.e. 0 0 1 * * |
@weekly |
Run once a week i.e. 0 0 * * 0 |
@daily |
Run once a day i.e. 0 0 * * * |
@midnight |
same as @daily |
@hourly |
Run once an hour i.e. 0 * * * * |
_ and .
Filenames containing either _ or . are not being executed by cron. For
example, referring to ../my_backup.sh would not be run by cron whereas
referring to ../mybackup would. This is true as of now (September
2008) and has been true so far. Possibly it might change some time.
Note that we can test whether or not a script would be run properly.
Bugs
sa@sub:~$ date
Mon Sep  8 14:35:22 CEST 2008
sa@sub:~$ man 1 crontab | grep -A5 ^BUGS
BUGS
       Although cron requires that each entry in a crontab end  in  a  newline
       character,  neither the crontab command nor the cron daemon will detect
       this error. Instead, the crontab will appear to load normally. However,
       the  command  will  never  run.  The best choice is to ensure that your
       crontab has a blank line at the end.
sa@sub:~$
In practice that means, we do not have blank lines (except for the
last one) in any crontab file (remember, I was talking about legends
and myths above; I assume not doing as I just said creates a lot of
them).
Common Mis{understandings,takes}
This subsections list common misunderstanding and mistakes with
regards to cron.
Ranges
People often misunderstand the first column which may create high
loads on some machines if not severe problems:
# run every Minute from 1am to 4am
* 1,2,3,4 * * * /usr/bin/somedirectory/somecommand

# run at 1am, 2am, 3am and 4am
0 1,2,3,4 * * * /usr/bin/somedirectory/somecommand
Environment Variables
Many folks use one-liners and/or scripts to do something e.g. restart
some daemon. What mostly happens then is that they test their code as
being a user e.g. sa in my case or even as being root which of
course works perfectly fine since all the environment is in place.
Once however they hand their scripts/code over to crond or atd they
forget about this little fact i.e. crond and atd have either a totally
different or no environment at all. One such case can be seen below
1  rd0:/home/notroot# cat /etc/cron.daily/tomcat55restart
2  #!/bin/sh
3  export JAVA_HOME=/usr/lib/jvm/java-6-sun/jre
4  export PATH=$PATH:/usr/lib/jvm/java-6-sun/jre
5  /etc/init.d/tomcat5.5 restart
6
7  rd0:/home/notroot#
Without line 3 and 4, tomcat would be stopped by crond but then it
would refuse to start simply because there is no JAVA_HOME set with
crond environment.
The % Thingy
I just read a mailing list where somebody did not figure why his
one-liner
0 * * * * $HOME/update.sh 2>&1 >$HOME/logs/$(date +%F_%H%M).log
would not do. I referred him to man 5 crontab:
-
The entire command portion of the line, up to a newline or
%
character, will be executed by /bin/sh or by the shell specified in
the SHELL variable of the crontab file. Percent-signs (%) in the
command, unless escaped with backslash (\), will be changed into
newline characters, and all data after the first % will be sent to the
command as standard input.
Testing
It is sensible to test that our cron jobs work as intended. One method
for doing this is to set up a cron job to run a couple of minutes in
the future and then check the results before finalizing the timing. In
practice, that would look something like the below:
 1  sub-ve23:~$ whoami
 2  sa
 3  sub-ve23:~$ crontab -l
 4  no crontab for sa
 5  sub-ve23:~$ crontab -e
 6  no crontab for sa - using an empty one
 7  crontab: installing new crontab
 8  sub-ve23:~$ crontab -l
 9  # m h  dom mon dow   command
10  */1 * * * * echo "we are testing..."
First of all, I am using a pristine system which I just fired up so we
have no other cron jobs lurking around. The parameters to crontab are
explained above respectively via crontab --help or man 1 crontab.
After issuing line 5, we are provided with an editor so we can create
our cron job which can be seen in line 10 after we issued line 8. The
cron job from line 10 triggers the command from field six every minute
(alternatively it could have been written * * * * * <command>) —
while testing, the sixth field is often used with logger e.g. logger
testing; we are using echo right now but then it does not matter what
command we use as long as something shows up in /var/log/syslog.
11  sub-ve23:~$ tail -n22 /var/log/syslog
12
13  [skipping a few lines...]
14
15  Sep  9 07:38:49 sub-ve23 crontab[307]: (sa) LIST (sa)
16  Sep  9 07:38:57 sub-ve23 crontab[308]: (sa) BEGIN EDIT (sa)
17  Sep  9 07:39:21 sub-ve23 crontab[308]: (sa) REPLACE (sa)
18  Sep  9 07:39:21 sub-ve23 crontab[308]: (sa) END EDIT (sa)
19  Sep  9 07:39:26 sub-ve23 crontab[310]: (sa) LIST (sa)
20  Sep  9 07:40:01 sub-ve23 /USR/SBIN/CRON[313]: (sa) CMD (echo "we are testing...")
21  Sep  9 07:41:01 sub-ve23 /USR/SBIN/CRON[316]: (sa) CMD (echo "we are testing...")
22  Sep  9 07:42:01 sub-ve23 /USR/SBIN/CRON[319]: (sa) CMD (echo "we are testing...")
23  Sep  9 07:43:01 sub-ve23 /USR/SBIN/CRON[322]: (sa) CMD (echo "we are testing...")
24  Sep  9 07:44:01 sub-ve23 /USR/SBIN/CRON[325]: (sa) CMD (echo "we are testing...")
25  Sep  9 07:45:01 sub-ve23 /USR/SBIN/CRON[328]: (sa) CMD (echo "we are testing...")
26  sub-ve23:~$ crontab -r
27  sub-ve23:~$ crontab -l
28  no crontab for sa
29  sub-ve23:~$
Now, we want to verify if our actions were successful. What can be
seen in lines 15 to 19 is basically the logs of what we did in lines 3
to 8, then, starting with line 20 we get proof that our cron job works
as expected — note the increasing time stamp; every minute, just as
planned. Finally we remove the crontab file (line 26) that we created
in lines 5 to 7. It is important to understand, that once we got
confirmation from the logs that some cron jobs runs, we can replace
field number six with some actual command/script to execute — the
echo thingy is just some dummy/placeholder command while testing.
In addition, some may also find it useful to put commands into script
files that log their success or failure e.g. echo "Nightly Backup
Successful: $(date)" >> /tmp/mybackup.log.
If we wanted to test whether or not a particular script would be run
as it should e.g. one we put inside /etc/cron.daily we could simple do
a dry run
wks:/home/sa# run-parts --test /etc/cron.daily
/etc/cron.daily/0anacron
/etc/cron.daily/apache2
/etc/cron.daily/apt
/etc/cron.daily/apt-listbugs
/etc/cron.daily/aptitude
/etc/cron.daily/bsdmainutils
/etc/cron.daily/chkrootkit
/etc/cron.daily/debsums
/etc/cron.daily/debtags
/etc/cron.daily/dlocate
/etc/cron.daily/dpkg
/etc/cron.daily/etckeeper
/etc/cron.daily/exim4-base
/etc/cron.daily/htdig
/etc/cron.daily/integrit
/etc/cron.daily/locate
/etc/cron.daily/logrotate
/etc/cron.daily/man-db
/etc/cron.daily/mdadm
/etc/cron.daily/mlocate
/etc/cron.daily/popularity-contest
/etc/cron.daily/quota
/etc/cron.daily/standard
/etc/cron.daily/sxid
wks:/home/sa#
This is especially interesting as it would reveal commonly made
mistakes that would prevent a script from being executed.
Examples
This sections shows examples so the whole subject becomes less
abstract. The /usr/bin/somedirectory/somecommand text in the below
examples indicates the task which will be run at the specified times.
It is recommended that we use the full path instead of using relative
paths to the desired commands as shown in the below examples. In order
to figure the absolute path we can issue which somecommand on the CLI
to find the full path to somecommand.
How a day may be specified
The day of a command’s execution can be specified by two fields —
dom
and dow. If both fields are restricted (i.e. are not *), the command
will be run when either field matches the current time. For example,
30 4 1,15 * 5 <command> would cause a command to be run at 4:30 am on
the 1st and 15th of each month, plus every Friday.
0
01 04 1 1 1 /usr/bin/somedirectory/somecommand
The above example will run /usr/bin/somedirectory/somecommand at
4:01am on January 1st and every Monday in January. An asterisk (*) can
be used so that every instance (every minute, every hour, every day of
the month, every month and every day of the week) of a time period is
used. The below example will run /usr/bin/somedirectory/somecommand at
4:01am every day.
01 04 * * * /usr/bin/somedirectory/somecommand
-
Best practice how to read crontab lines is from right to left. Thereby
we think of a straight line, 365 sections starting with January 1st on
the left to December 31st at the right.
01 04 1 1 1 then tells us to
mark all Mondays onto our imaginary time line. Next, the window
shrinks to January — Mondays still marked. So after the first two 1
we stare at all Mondays in January — we unmark all Mondays NOT in
January.
-
Then we move further left and recognize yet another
1, telling us to
pick the 1st of any month... but of course, the second 1 already
shrunk our time window down to January so finally we mark January the
1st. As of now, we have marked all Mondays in January plus January
1st.
-
Finally, we take a look at the last two fields, hour(s) and minute(s).
This is easy, at every marked day onto our imaginary time line, we can
now shrink the mark down from whole day to 04:01am.
1
Comma-seperated values can be used to run more than one instance of a
particular command within a time period. Hyphen-seperated values can
be used to run a command continuously.
01,31 04,05 1-15 1,6 * /usr/bin/somedirectory/somecommand
The above example will run /usr/bin/somedirectory/somecommand at 01
and 31 past the hours of 4:00am and 5:00am (i.e. 4:01am, 4:31am,
5:01am and 5:31am) on the 1st through the 15th of every January and
June. Again, using my described method for {en,de}coding this works
just great.
2
Now we are looking at some realistic crontab file, not only containing
the first five fields and the /usr/bin/somedirectory/somecommand but
also other settings, comments etc.
 1  SHELL=/bin/bash
 2  MAILTO=sa
 3  #
 4  5 0 * * *       /opt/bin/daily.job >> /tmp/out 2>&1
 5  @reboot /usr/bin/somedirectory/somecommand
 6  15 14 1 * 6,7  /usr/bin/somedirectory/somecommand
 7  0 22 * * 1-5    mail -s "It’s 10pm" joe%Joe,%%Where are your kids?%
 8  17 0-23/2 * * * echo "run 17 minutes past midnight, 2am, 4am..., everyday"
 9  5 4 * * sun     echo "run at 4:05am every Sunday"
10
Lines 1 to 10 determine:
- use
/bin/bash to run commands, instead of the default /bin/sh. In
real, I do not use this since Bash is Debian's default shell
anyway.
- mail any output to
sa, no matter whose crontab file this is
- comment
- run five minutes after midnight, every day
- Run once i.e. at startup
- at 2:15pm, on weekends and every first of the month, run somecommand
- at 10 pm on weekdays, annoy Joe
- see command
- see command
- blank line
Anacron
- What is Anacron?
-
I already mentioned it but not in detail, so... Anacron is a periodic
command scheduler. It executes commands at intervals specified in
days. Unlike cron, it does not assume that the system is running
continuously. It can therefore be used to control the execution of
daily, weekly and monthly jobs (or anything with a period of n days),
on systems that do not run 24/7. When installed and configured
properly, Anacron will make sure that the commands are run at the
specified intervals as closely as machine-uptime permits.
-
Every time Anacron is run, it reads a configuration file (see
man 5
anacrontab
) that specifies the jobs Anacron controls, and their
periods in days. If a job was not executed in the last n days, where n
is the period of that job, Anacron executes it. Anacron then records
the date in a special timestamp file that it keeps for each job, so it
can know when to run it again. When all the executed commands
terminate, Anacron exits.
- Why may Anacron be useful?
-
Most Unix-like systems have daily, weekly and monthly scripts that
take care of various housekeeping chores such as log-rotation,
updating the
locate and man databases, etc. Daily scripts are usually
scheduled as cron-jobs to execute during the night. Weekly scripts are
scheduled to run on weekends. On machines that are turned off for the
night or for the weekend, these scripts rarely get run.
-
Anacron solves this problem. These jobs can simply be scheduled as
Anacron-jobs with periods of 1, 7 and 30 days. Anacron is especially
intended for laptop users and for people who only turn their computer
on for a few hours a day.
- What is Anacron not?
-
Anacron is not an attempt to make cron redundant. It cannot be used to
schedule commands at intervals smaller than days. It also does not
guarantee that the commands will be executed at any specific day or
hour. It is not a full-time daemon
i.e. it has to be executed from boot scripts, from cron-jobs, or
explicitly invoked by some human.
More information on this whole matter can be found with man 5
anacrontab and man 8 anacron plus there is the information about
anacron which I already mentioned within the cron section above.
at / batch
This one I love! Imagine you scheduled a hiking tour with
friends/family etc. to start at Saturday 8am. What usually happens is,
a whole group of people has to wait for one or two special individuals
for whatever reason... This problem can be dealt with using the
combined forces of SSH (Secure Shell) and at.
-
For example, there is the workaholic friend who just cannot get to bed
early enough the day before... no problem, we use SSH and at to turn
off his computer at 10pm the day before (of course we make it
unbootable till afternoon the next day). I also got a nephew who likes
to play computer all night long... yes, I do... Then there is mom,
so totally into checking her stocks in the morning so she gets late as
well — no problem, again, our magic strikes at around 7:20am. My
favorite however is this one:
Current_girlfriend+openwengo/skype+friend_on_the_other_side_globe =
lateness. Again, I got my magic in place ^^ This whole stuff gets even
cooler now that I equip all the folks with FLOSS (Free/Libre Open
Source Software) cell phones... yes, I do... Marginal note: I am
sooooo pro for FLOSS on TV sets, cars... ;-]
What at/batch is/does?
at and batch read commands from standard input or a specified file
which are to be executed at a later time, using /bin/sh.
- at will execute a command at some future time, only once.
at is the
front end to the atd daemon which, like crond will almost
definitely be running at any Debian box.
batch executes commands when system load levels permits it. In
other words, when the load average drops below 1.5, or the value
specified in the invocation of atd.
As ever, there are manual files provide us with anything we possibly
need/want to know —
man 8 atd and man 1 at respectively. For the
super-nosy... walk the source Luke!
Examples
 1  sa@sub:~$ date +%R && tty && at now+1 minutes
 2  13:46
 3  /dev/pts/0
 4  warning: commands will be executed using /bin/sh
 5  at> date +%R > /dev/pts/0
 6  at> <EOT>
 7  job 9 at Thu Sep 11 13:47:00 2008
 8  sa@sub:~$ atq
 9  9       Thu Sep 11 13:47:00 2008 a sa
10  sa@sub:~$ 13:47
I think the example is pretty much self explaining. Only line 6 might
need an explanation — after hitting RET at the end of line 5, I used
C-d in line 6 to end the input procedure. We can of course specify a
particular time as can be seen below.
sa@sub:~$ date +%R
13:52
sa@sub:~$ at 13:54
warning: commands will be executed using /bin/sh
at> echo "... we simply rock harder!" > /dev/pts/0
at> <EOT>
job 11 at Thu Sep 11 13:54:00 2008
sa@sub:~$ at -l
11      Thu Sep 11 13:54:00 2008 a sa
sa@sub:~$ ... we simply rock harder!

sa@sub:~$ date +%R
13:54
sa@sub:~$ at teatime - 104 minutes
warning: commands will be executed using /bin/sh
at> banshee --query-{artist,title} > /dev/pts/0
at> <EOT>
job 16 at Thu Sep 11 14:16:00 2008
sa@sub:~$ atq
16      Thu Sep 11 14:16:00 2008 a sa
sa@sub:~$ date +%R
14:15
sa@sub:~$
artist: Frank Sinatra
title: Fly Me To The Moon
sa@sub:~$
As adding to e.g. now, teatime etc. works, subtracting works as well
as can be seen above. With the next example, I am going to provide a
whole big picture view on at.
sa@sub:~$ date
Thu Sep 11 14:48:43 CEST 2008
sa@sub:~$ at 1am tomorrow
warning: commands will be executed using /bin/sh
at> echo "this one gets executed tomorrow 1am"
at> <EOT>
job 17 at Fri Sep 12 01:00:00 2008
sa@sub:~$ at -l
17      Fri Sep 12 01:00:00 2008 a sa
sa@sub:~$ at 3am today
at: refusing to create job destined in the past
sa@sub:~$ at 3pm today
warning: commands will be executed using /bin/sh
at> echo "now, 3pm works whereas 3am does of course not..."
at> <EOT>
job 18 at Thu Sep 11 15:00:00 2008
sa@sub:~$ at -l
18      Thu Sep 11 15:00:00 2008 a sa
17      Fri Sep 12 01:00:00 2008 a sa
sa@sub:~$ at noon
warning: commands will be executed using /bin/sh
at> echo "well, at noon... tomorrow"
at> <EOT>
job 19 at Fri Sep 12 12:00:00 2008
sa@sub:~$ date +%R
14:56
sa@sub:~$ at -l
18      Thu Sep 11 15:00:00 2008 a sa
17      Fri Sep 12 01:00:00 2008 a sa
19      Fri Sep 12 12:00:00 2008 a sa
sa@sub:~$ echo 'Got my Audi Q7 TDI V12 deliverd today, going crusin later... wiiiiiiii ;]' > /tmp/ridin && at midnight -f /tmp/ridin
warning: commands will be executed using /bin/sh
job 20 at Fri Sep 12 00:00:00 2008
sa@sub:~$ date +%R
15:07
sa@sub:~$ at -l
20      Fri Sep 12 00:00:00 2008 a sa
17      Fri Sep 12 01:00:00 2008 a sa
19      Fri Sep 12 12:00:00 2008 a sa
sa@sub:~$ at -l && at -l | cut -f1 | xargs -n1 -i{} at -c {} | grep ^} -A1 | egrep -v ^-\|}
20      Fri Sep 12 00:00:00 2008 a sa
17      Fri Sep 12 01:00:00 2008 a sa
19      Fri Sep 12 12:00:00 2008 a sa
Got my Audi Q7 TDI V12 deliverd today, going crusin later... wiiiiiiii ;]
echo "this one gets executed tomorrow 1am"
echo "well, at noon..."
sa@sub:~$ at -d 19
sa@sub:~$ at -l && at -l | cut -f1 | xargs -n1 -i{} at -c {} | grep ^} -A1 | egrep -v ^-\|}
20      Fri Sep 12 00:00:00 2008 a sa
17      Fri Sep 12 01:00:00 2008 a sa
Got my Audi Q7 TDI V12 deliverd today, going crusin later... wiiiiiiii ;]
echo "this one gets executed tomorrow 1am"
sa@sub:~$ atrm 20 17
sa@sub:~$ atq
sa@sub:~$
Time and Timezone
This section is about setting the harware clock, time and timezone to
adjust a computers time to e.g. reflect local time. As ever, a few
files are important to know in order to get the big picture on this
subject.
/etc/localtime has the timezone that was selected when we installed
the system. It stores stuff like:
- Offset in seconds from UTC (Universal Time Coordinated).
- Whether DST (Daylight Saving Time) applies to that timezone, and
when daylight savings time applies — as it can happen in
different regions at different times, or not at all.
/etc/timezone contains only one line, the currently selected
timezone that is. When we run dpkg-reconfigure tzdata, it updates
both /etc/localtime, and writes the timezone we selected in
/etc/timezone. At least on Debian releases starting with Sarge —
Woody did not keep the timezone in /etc/timezone, but then
/etc/localtime was a soft-link to the timezone selected.
Viewing Timezones
This can be done with tzselect. Note that tzselect will not actually
change the timezone — it will only change the timezone of our current
shell. It is not even permanent (as will be explained when we run the
command to completion; see below). In order to achieve persistent
changes with systemtime, we have to use dpkg-reconfigure tzdata to
achieve this (see below).
sa@sub:~$ tzselect
Please identify a location so that time zone rules can be set correctly.
Please select a continent or ocean.
 1) Africa
 2) Americas
 3) Antarctica
 4) Arctic Ocean
 5) Asia
 6) Atlantic Ocean
 7) Australia
 8) Europe
 9) Indian Ocean
10) Pacific Ocean
11) none - I want to specify the time zone using the Posix TZ format.
#? 8
Please select a country.
 1) Aaland Islands        18) Greece                35) Norway
 2) Albania               19) Guernsey              36) Poland
 3) Andorra               20) Hungary               37) Portugal
 4) Austria               21) Ireland               38) Romania
 5) Belarus               22) Isle of Man           39) Russia
 6) Belgium               23) Italy                 40) San Marino
 7) Bosnia & Herzegovina  24) Jersey                41) Serbia
 8) Britain (UK)          25) Latvia                42) Slovakia
 9) Bulgaria              26) Liechtenstein         43) Slovenia
10) Croatia               27) Lithuania             44) Spain
11) Czech Republic        28) Luxembourg            45) Sweden
12) Denmark               29) Macedonia             46) Switzerland
13) Estonia               30) Malta                 47) Turkey
14) Finland               31) Moldova               48) Ukraine
15) France                32) Monaco                49) Vatican City
16) Germany               33) Montenegro
17) Gibraltar             34) Netherlands
#? 46

The following information has been given:

        Switzerland

Therefore TZ='Europe/Zurich' will be used.
Local time is now:      Sat Sep 13 20:27:09 CEST 2008.
Universal Time is now:  Sat Sep 13 18:27:09 UTC 2008.
Is the above information OK?
1) Yes
2) No
#? 1

You can make this change permanent for yourself by appending the line
        TZ='Europe/Zurich'; export TZ
to the file '.profile' in your home directory; then log out and log in again.

Here is that TZ value again, this time on standard output so that you
can use the /usr/bin/tzselect command in shell scripts:
Europe/Zurich
sa@sub:~$
Setting the Timezone
When we installed the base system of Debian GNU/Linux, we set the
timezone which we can check with
sa@sub:~$ cat /etc/timezone
Europe/Vienna
sa@sub:~$
The time zone is needed because Unix computers keep time in UTC
(Universal Time Coordinated), and local time is calculated from based
on UTC time. UTC is solar time on meridian 0. UTC was previously
called GMT (Greenwich Mean Time) because meridian 0 passes through the
old Royal Observatory in Greenwich, which is part of London, England.
UTC is constant, and is not subject to DST (Daylight Saving Time) or
other changes. This is what makes it useful for synchronizing
computers. As long as the base time is kept in UTC, computers all over
the world can be synchronized and yet maintain their local time
information.
If we were to set our Debian GNU/Linux computer to use local time,
without taking account of timezones, we would lose the benefit of
automatic DST changes — something not recommended. However, it may be
necessary to compromise by setting our hardware clock to local time
for operating systems not understanding timezone settings. Since
DebianGNU/Linux does understand different timezones, we assume that we
have configured our computer to use UTC.
To change the default setting
sa@sub:~$ gr utc /etc/default/rcS
13:UTC=yes
sa@sub:~$
we would alter UTC=yes to UTC=no. Should for
some reason, some Debian box not be set up to use UTC per default,
then I would recommend to alter this and then to reboot after editing
/etc/default/rcS to get the changes effective.
If the timezone is correctly set up, and the timezone configuration
files are reasonably current, the local time shown by the operating
system will change to DST and back to normal time automatically on the
correct dates. If the timezone files we have are old, there may be
problems because DST start and end dates are not determined by a
physical phenomenon, but are chosen by national institutions.
Sometimes these dates are changed, for example, the European Union
changed the end date from the last Sunday in September to the last
Sunday in October in 1995. For this reason, we should make sure that
our libc6 package is kept reasonably up to date — from Debian
GNU/Linux release 2.2 onwards, Debian contains the timezone data.
Changing the timezone after Installation
I do this every time I have to change wrong settings or simply need to
adapt local time with some Debian installation to reflect local time.
Also, whenever I travel, I do this i.e. setting local time to my
destinations timezone. Perhaps it is needless to say, but we should
not muck with /etc/localtime and /etc/timezone directly but instead
use tzconfig (obsolete) respectively dpkg-reconfigure tzdata, as it
will update both correctly, and possibly do some other stuff as well.
 1  sub:/# cat /etc/timezone
 2  Europe/Istanbul
 3  sub:/# date
 4  Sat Sep 13 17:33:12 EEST 2008
 5  sub:/# dpkg-reconfigure tzdata
 6
 7  Current default timezone: 'Europe/London'
 8  Local time is now:      Sat Sep 13 15:33:51 BST 2008.
 9  Universal Time is now:  Sat Sep 13 14:33:51 UTC 2008.
10
11  sub:/# cat /etc/timezone
12  Europe/London
13  sub:/# date
14  Sat Sep 13 15:33:58 BST 2008
15  sub:/#
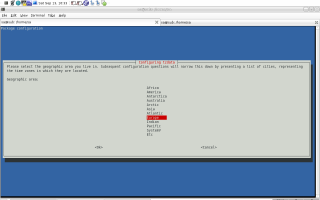
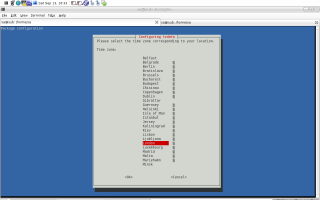
With the example above I am changing the timezone from Istanbul to
London simply because I am sitting on a plane from Istanbul to London
right now. The images below are screenshots taken after I issued
line 5.
Setting the TZ Environment Variable
If we do not have root privileges or want to set a different timezone
for ourselves that is different than the one the system uses, we can
set the environment variable TZ. To find out about the correct
timezone, tzselect can be used as I already showed above.
 1  sub:/# cat /etc/timezone
 2  Europe/London
 3  sub:/# date
 4  Sat Sep 13 16:04:18 BST 2008
 5  sub:/# echo $TZ
 6
 7  sub:/# export TZ=Europe/Vienna
 8  sub:/# date
 9  Sat Sep 13 17:04:43 CEST 2008
10  sub:/# cat /etc/timezone
11  Europe/London
12  sub:/# echo $TZ
13  Europe/Vienna
14  sub:/#
As can be seen in line 2 our currently set timezone is London, current
time is ~16:04. In line 5 we are taking a closer look at TZ and its
contents. Since TZ is unset, we set a temporary (just for this shell
session) timezone in line 7. This works as can be seen in line 9. If
we take a closer look (line 11), we can see that using TZ (line 13) to
set a different timezone really is just a temporary thing as it does
not alter /etc/timezone.
Dual-boot
The rule of thumb for the UTC setting in /etc/default/rcS is that if
our computer is NOT dual-booted, we can set UTC to yes.
sa@sub:~$ gr utc /etc/default/rcS
13:UTC=yes
sa@sub:~$
This simplifies things because UTC does not jump around based on DST
(Daylight Saving Time), so when we boot after DST, the system does not
have to guess whether the clock has been updated or not.
But if we for example use dual boot with Windows, Windows will expect
the hardware clock to be our local time, so we should set
UTC=no. If we set UTC=yes, if we visit our
BIOS, to change the clock, we will need to set it to UTC, as that is
what the system will expect when booting. We will probably notice soon
enough that something is wrong.
Oh, and changing the UTC setting in /etc/default/rcS does not require
a reboot. True, the clock will not be set until the next shutdown and
the system writes the UTC time to the clock, but nothing requires us
to do that after modifying that value. However, lucky me, I am not
using any OS aside Debian... ;-]
Hardware Clock
A Debian installation will, by default, call hwclock --hctosys during
system startup and hwclock --systohc during system shutdown. In order
to set the date/time of the system, we just have to use the standard
UNIX date facilities e.g. date or any of the advanced timekeeping
utilities i.e. NTP (Network Time Protocol) software. Other methods of
setting the clock (such as hwclock) are likely to cause trouble,
therefore I recommend to not use them.
-
Please note that because the shutdown scripts call
hwclock --systohc,
we cannot set the clock using hwclock only, as our adjustment will be
lost on the next reboot. This means we must NOT follow the procedures
described with man 8 hwclock to set the clock date/time using a reboot
unless we also edit the shutdown scripts. The full story:
A Linux system actually has two clocks —
hwclock is then used to copy
time back and forth between those two clocks
- The System Clock, kept by the Linux kernel itself. This is the
clock that Linux uses for day-to-day activities, and this is also
the clock altered if we use
date -s.
- The Hardware Clock is a chip onto a computers motherboard. The
harware clock is often also called RTC (Real-time Clock), which is
used as a backup to keep time while the computer is turned off, or
in APM (Advanced Power Management) suspended state. This is the
clock set by using
hwclock --set.
For the Debian standard install, the system clock is initialized with
the value of the hardware clock during startup, and the value of the
system clock is copied back to the hardware clock during system
shutdown/reboot. So, in a Debian default install, we can keep the
illusion that there is a single clock. Unless we use a program that
modifies the hardware clock directly and does not set the system clock
as well, that is.
Dealing with Time Drifts
hwclock has a facility to correct for systematic drift in the hardware
clock, accessed by hwclock --adjust. This facility is dangerous
because it has a severe drawback — it assumes that no program other
than hwclock --systohc will ever be used to change the hardware clock.
This assumption is often false, as many common utilities such as ntpd,
chrony, as well as our computer's BIOS program and any other OSes out
there, will change the hardware clock.
Also, if hwclock --adjust is used, one must make sure the drift file
(/etc/adjtime) is deleted every time the system clock is set to a very
different value — even if we are using hwclock itself — or the drift
computation might become invalid and cause the hardware clock to be
incorrectly set the next time hwclock --adjust is used.
hwclock currently does not perform any sort of sanity checks in the
values it uses to compute the drift file, and will corrupt our clock
time by potentially very large amounts if anything goes wrong.
Therefore I strongly recommend to NOT use the hwclock --adjust
facility at all but to refer to alternatives which tend to be much
more safe.
NTP
What NTP (Network Time Protocol) is and the theory behind it is very
well explained here. One common message no matter what NTP software is
finally used is
-
We should NOT configure our system to query level 1 — also known as
Stratum 1 — NTP servers! If someone thinks he needs to do this, well,
he is wrong... As an exception: if we for example install some NTP
software which is configured to use a stratum 1 out of the box then
this is mostly all right since the folks who did package this software
probably did this for a reason...
-
Stratum 1 indicates a computer with a locally attached reference
clock. A computer that is synchronised to a stratum 1 computer is at
stratum 2. A computer that is synchronised to a stratum 2 computer is
at stratum 3, and so on.
Overview
Chrony is a software package for maintaining the accuracy of computer
system clocks. It consists of a pair of programs :
chronyd, a daemon which runs in background on the system. It
obtains measurements e.g. via the Internet of the system's offset
relative to other systems, and adjusts the system time accordingly.
For isolated systems, the user can periodically enter the correct
time by hand (using chronyc). In either case, chronyd determines
the rate at which the computer gains or loses time, and compensates
for this. chronyd can also act as an NTP server, and provide a
time-of-day service to other computers. A typical set-up is to run
chronyd on a gateway computer, and use it to serve time to
computers on a private LAN sitting behind the gateway. The IP
addresses that can act as clients of chronyd can be tightly
controlled. The default is no client access.chronyc, is a command-line driven control and monitoring program.
An administrator can use this to fine-tune various parameters with
chronyd, add or delete servers etc. whilst chronyd is running (i.e.
no downtime). The IP addresses from which chronyc clients may
connect to cronyd can be tightly controlled. The default is just
the computer that chronyd itself is running on — this is the
operating scenario where we only have one instance of chrony,
acting as client and server at the same time in order to
set/correct the time of the computer it is installed on.
Comparison with xntpd
The reference implementation of the Network Time Protocol is the
program xntpd also known as ntpd (apt-cache show ntp). xntpd is
designed to support all the operating modes defined by RFC1305, and
has driver support for a large number of reference clocks (such as GPS
receivers) that can be connected directly to a computer, thereby
providing a so-called stratum 1 server.
Things chronyd can do but xntpd cannot
chronyd can perform usefully in an environment where access to the
time reference is intermittent. chronyd estimates both the current
time offset and the rate at which the computer's clock gains or
loses time, and can use that rate estimate to trim the clock after
the reference disappears. xntpd corrects any time offset by
speeding up and slowing down the computer clock, and so could be
left with a significant rate error if the reference disappears
whilst it is trying to correct a big offset.chronyd provides support for isolated networks whether the only
method of time correction is manual entry (e.g. by the
administrator looking at a clock). chronyd can look at the errors
corrected at different updates to work out the rate at which the
computer gains or loses time, and use this estimate to trim the
computer clock subsequently.chronyd provides support to work out the gain or loss rate of the
RTC (Real-time Clock), i.e. the clock that maintains the time when
the computer is turned off (see above). It can use this data when
the system boots to set the system time from a corrected version of
the real-time clock. These real-time clock facilities are only
available on certain releases of Linux, so far.- The
xntpd program is supported by other programs to carry out
certain functions. ntpdate is used to provide an initial correction
to the system clock based on a one-shot sampling of other NTP
servers. tickadj is used to adjust certain operating system
parameters to make xntpd work better. All this functionality is
integrated into chronyd out of the box...
Things xntpd can do that Chronyd cannot
xntpd supports a range of different hardware reference clocks (GPS,
atomic etc) that can be connected to a computer to provide a
stratum-1 server. chronyd does not support any such hardware yet.xntpd supports effectively all of RFC1305, including broadcast /
multicast clients, leap seconds, and extra encryption schemes for
authenticating data packets.- So far,
xntpd has been ported to more types of operating system.
xntpd is designed to work solely with integer arithmetic (i.e. does
not require floating point support from its host).
Comparison with timed
timed is a program that is part of the BSD networking suite. It uses
broadcast packets to find all machines running the daemon within a
subnet. The machines elect a master which periodically measures the
system clock offsets of the other computers using ICMP timestamps.
Corrections are sent to each member as a result of this process.
Problems that may arise with timed are
- Because it uses broadcasts, it is not possible to isolate its
functionality to a particular group of computers i.e. there is a
risk of upsetting other computers on the same network e.g. where a
whole company is on the same subnet but different departments are
independent from the point of view of administering their
computers.
- The update period appears to be 10 minutes. Computers can build up
significant offsets relative to each other in that time. If a
computer can estimate its rate of drift it can keep itself closer
to the other computers between updates by adjusting its clock every
few seconds.
timed does not seem to do this.
timed does not have any integrated capability for feeding real-time
into its estimates, or for estimating the average rate of time
loss/gain of the machines relative to real-time (unless one of the
computers in the group has access to an external reference and is
always appointed as the master).
timed does have the benefit over chronyd that for isolated networks of
computers, they will track the majority vote time. For such isolated
networks, chronyd requires one computer to be the master with the
others slaved to it. If the master has a particular defective clock,
the whole set of computers will tend to slip relative to real time
(but they will stay accurate relative to one another).
Chrony
We are going to use Chrony — an excellent choice for NTP software on
Unix-like OSes. Chrony is daemon software which can be used to
synchronize our LAN (Local Area Network) or just a single computer
with some reference clock on the net.
Chrony can be used in standalone mode (synchronize the computer it is
installed on) or in server/client setups where one machine acts as NTP
server to all other machines within a network i.e. all machines would
run chrony and the only difference if a machine would act as server or
client is with its configuration.
Operating Scenarios
As mentioned, chrony can be used with several operating scenarios —
from standalone computer, mobile gadgets for on the go (e.g. some
subnotebook) up to providing the time for thousands of servers within
some datacenter. From my point of view, there are only three operating
scenarios I find worth mentioning:
- Isolated network i.e. we have an isolated network with no
reference clocks e.g. a computer deep down below the earths
surface on-board of some submarine, a box down in some coal mine
etc. — in both cases there might be no access to some reference
clock nor the Internet so the correct time has to be input via a
manual procedure.
- Permanent connectivity to the Internet i.e. our computer is
permanently on the Internet (or on a private network with NTP
servers) e.g. some server within the datacenter, workstation at
home, gateway computer at home which acts as an NTP server for the
LAN, etc.
- Infrequent connectivity to the Internet i.e. our computer connects
to the Internet sometimes e.g. when we are traveling and connect
via some WiFi AP (Access Point) at the airport, coffee house in
Budapest or one of Basil's numerous beach bars.
I only dealt once with #0 (some embedded gear within a robot; then the
thingy got WiFi anyway so #2 it was). #1 and #2 are of main interest
to us — in both cases there can be
- Standalone - one computer running chrony for itself
- Client / Server - one computer acting as NTP server for a bunch of
other computers acting as NTP clients
How so? Well, for #1 there could be one computer with permantent
connectivity to the Internet. We are done. Also, this computer might
be a LANs gateway box, acting as NTP server to all other computers
within the LAN.
For #2 we might be talking about a notebook used by some guy on the
go, getting connectivity to the Internet sometimes —
chronyd then
pools some NTP servers and can then adjust local time, update drift
information etc. Also, this box might actually act as NTP server for
other computers within some LAN...
As an example, I run chrony on my subnotebook, at one location while
permanently connected to the Internet, chronyd updates itself, then I
leave this location and spend weekend onto some alpine hut where I
arrive with my subnotebook (which has very accurate time at that time)
and can then provide a pretty accurate time to all the computers
within the huts LAN which are without connectivity to the Internet
(that were before I installed broadband satellite Internet; now we are
talking #1 here too).
Selection of FAQ about Chrony
Sometimes I get 501 Not authorised. What does that mean?
-
Please go here for more information.
I have several computers on a LAN. Should I make one the master, or
make them all clients of an external server?
-
The best configuration is to make one computer the master, with the
others as clients of it. This can be done by adding a
local directive
to the master's chrony.conf file.
-
This configuration will be better because: the load on the external
connection is less, the load on the external NTP server(s) is less and
if our external connection goes down, the computers on the LAN will
maintain a common time with each another.
I want to use chronyd 's real-time clock support. Must I disable
hwclock?
-
The
hwclock program is often set-up by default in the boot and
shutdown scripts with many Linux installations. If we want to use
chronyd 's real-time clock support, the important thing is to disable
hwclock in the shutdown procedure. If we do not, it will over-write
the RTC (Real-time Clock) with a new value, unknown to chronyd. At the
next reboot, chronyd will compensate this (wrong) time with its
estimate of how far the RTC has drifted whilst the power was off,
giving a meaningless initial system time.
-
Even though there is no need to remove
hwclock from the boot process
as long as chronyd is started after it has run, setting
HWCLOCKACCESS=no in /etc/default/rcS prevents hwclock
from setting RTC time on boot time as well. This is not mandatory but
— we only want to prevent hwclock from touching the RTC at shutdown
— then it does no harm either since chronyd takes care of setting the
RTC to accurate time after booting the machine anyway. This whole
procedure is explained below...
What happens if the network connection is dropped without using
chronyc's 'offline' command first?
-
In this case chronyd will keep trying to access the server(s) that it
thinks are online. Eventually it will decide that they are unreachable
and no longer consider itself synchronised to them. If you have other
computers on your LAN accessing the computer that is affected this
way, they too will become 'unsynchronised', unless you have the
'local' directive set up on the master computer.
-
The 'auto_offline' option to the 'server' entry in the chrony.conf
file may be useful to avoid this situation.
Can chrony be driven from broadcast NTP servers?
-
No. I remember looking at how they worked when I was first writing
chrony. Since the 'target market' then was dial-up systems, broadcast
packets were not relevant so I didn't bother working out how to deal
with the complexities of doing the delay estimation.
-
I no longer have root access to a LAN environment to develop and test
broadcast server support. Neither have I the time to work on this. I
would be very happy to accept a patch from anyone who can develop,
test and debug the necessary changes! </comment>
Installation
Installing chrony is trivial as can be seen below — either aptitude
install chrony or apt-get install chrony does the trick. What can also
be seen are the two major components (chronyd and chronyc) which are
bundled with the package chrony.
sa@sub:~$ type afl
afl is aliased to `apt-file list'
sa@sub:~$ afl chrony | grep bin
chrony: /usr/bin/chronyc
chrony: /usr/sbin/chronyd
sa@sub:~$ su
Password:
sub:/home/sa# apt-get install chrony
Reading package lists... Done

[skipping a lot of lines...]

Setting up chrony (1.23-3)...

Creating config file /etc/chrony/chrony.conf with new version
Starting /usr/sbin/chronyd...
Processing triggers for menu...
sub:/home/sa#
Configuration for a Standalone Box
After chrony has been installed it need be set up. Before we do so, we
should already know which operating scenario we need plus read through
crony's documentation respectively take a look at its files (see
below).
Information
Information with regards to chrony can be found at manual files i.e.
man 5 chrony.conf, man 1 chrony, man 1 chronyc and man 8 chronyd
Files and Directories
On my subnotebook, /etc/chrony/chrony.conf looks like this. What this
file is, what it does and also what other files/directories are
associated with chrony can be found below.
sa@sub:~$ grep -v \# /etc/chrony/chrony.conf | grep .
server 0.debian.pool.ntp.org offline minpoll 8
server 1.debian.pool.ntp.org offline minpoll 8
server 2.debian.pool.ntp.org offline minpoll 8
server 3.debian.pool.ntp.org offline minpoll 8
keyfile /etc/chrony/chrony.keys
commandkey 1
driftfile /var/lib/chrony/chrony.drift
log tracking measurements statistics
logdir /var/log/chrony
maxupdateskew 100.0
dumponexit
dumpdir /var/lib/chrony
local stratum 10
allow 10/8
allow 192.168/16
allow 172.16/12
logchange 0.5
rtcfile /var/lib/chrony/chrony.rtc
rtconutc
sa@sub:~$
/etc/chrony/chrony.conf, Main configuration file. One might take a
look at /usr/share/doc/chrony/examples/chrony.conf.example.gz for
examples./etc/chrony/chrony.keys, The key-file, containing all keys in order
to ensure/provide access control to chrony itself and its services
i.e. authentication of NTP packets and authentication of
administrator commands entered via chronyc. One might take a look
at /usr/share/doc/chrony/examples/chrony.keys.example for examples./var/lib/chrony/chrony.drift, One of the main activities of the
chronyd program is to work out the rate at which the system clock
gains or loses time relative to real time. Whenever chronyd
computes a new value of the gain/loss rate, it is desirable to
record it somewhere. This allows chronyd to begin compensating the
system clock at that rate whenever it is restarted, even before it
has had a chance to obtain an equally good estimate of the rate
during the new run. (This process may take many minutes, at least)./var/lib/chrony/chrony.rtc, chronyd saves information in this file
when it exits and when the writertc command is issued in chronyc.
The information saved is the RTC's error at some epoch, that epoch
(in seconds since January 1 1970), and the rate at which the RTC
gains or loses time./var/run/chronyd.pid, chronyd always writes its PID (Process
Identifier) to a file, and checks this file on startup to see if
another chronyd may already be running on the system. By default,
the file used is /var/run/chronyd.pid./etc/init.d/chrony the file used to start/stop/restart/reload
chronyd respectively a new configuration into chronyd./var/lib/chrony, To compute the rate of gain or loss of time,
chronyd has to store a measurement history for each of the time
sources it uses. A source whose IP address is 1.2.3.4 would have
its measurement history saved in the file
/var/log/chrony/1.2.3.4.dat. Certain systems (so far only Linux)
have operating system support for setting the rate of gain or loss
to compensate for known errors. (On other systems, chronyd must
simulate such a capability by periodically slewing the system clock
forwards or backwards by a suitable amount to compensate for the
error built up since the previous slew). For such systems, it is
possible to save the measurement history across restarts of chronyd
(assuming no changes are made to the system clock behavior whilst
it is not running). If this capability is to be used (via the
dumponexit command in the configuration file, or the dump command
in chronyc), the dumpdir command should be used to define the
directory where the measurement histories are saved.
Ports
The chrony package needs two ports to be open for UDP (User Datagram
Protocol) in order to function properly
sub:/home/sa# netstat -tulpean | grep chrony
udp        0      0 0.0.0.0:323             0.0.0.0:*                           0          78164       10509/chronyd
udp        0      0 0.0.0.0:123             0.0.0.0:*                           0          78163       10509/chronyd
sub:/home/sa#
- 123 as any other NTP software and
- 323 for communications between
chronyc and chronyd
It is therefore important to configure packet filters like for
example Iptables to allow connection for UDP over port 123 and 323.
Security with Chrony
Many of the commands available through chronyc have a fair amount of
power to reconfigure the run-time behavior of chronyd. Consequently,
chronyc is quite dangerous for the integrity of the target system's
clock performance. Having access to chronyd via chronyc is more or
less equivalent to being able to modify chronyd 's configuration file
and to restart chronyd.
Chronyc also provides a number of monitoring (as opposed to
commanding) commands, which will not affect the behavior of chronyd.
However, we may still want to restrict access to these commands. In
view of this, access to some of the capabilities of chronyc will
usually be tightly controlled. There are two mechanisms supported:
- The set of hosts from which
chronyd will accept commands can be
restricted. By default, commands will only be accepted from
the same host that chronyd is running on.
- Any command that actually reconfigures some aspect of
chronyd 's
behavior requires the user of chronyc to know a password. This
password is specified in chronyd 's keys file and specified via
the commandkey option in its configuration file.
Only the following commands can be used without providing a password:
exit, help, password, quit, rtcdata, sources, sourcestats and
tracking. All other commands require a password to have been specified
previously, because they affect chronyd 's operation. An exemplary
use of chronyc when providing a password can be seen below:
sa@sub:~$ su
Password:
sub:/home/sa# chronyc
chrony version 1.23, copyright (C) 1997-2002 Richard P. Curnow
chrony comes with ABSOLUTELY NO WARRANTY.
This is free software, and you are welcome to redistribute it
under certain conditions.
See the GNU General Public License version 2 for details.

chronyc> password
Password:
200 OK
chronyc> dump
200 OK
chronyc> writertc
200 OK
chronyc> trimrtc
200 OK
chronyc> quit
sub:/home/sa#
Hwclock
As we already know, we got two clocks within our system... If the RTC
(Real-time Clock) is not corrected then it will never show the correct
time simply because some crystal-controlled chip can never be as
accurate as some reference clock.
With chrony we cannot just ensure that the system clock is set
accurately but also can we set the RTC to accurate time. This however
takes some time since chrony does this by adding/substracting small
portions to the current time instead of changing the time in one big
step — this is true for setting the time with the system clock as
well as the RTC. Therefore, we should not trust our system clock nor
the RTC until we have had a chance of being connected to the Internet
for say 60-minutes or so in order to allow chrony to re-sync the
system clock as well as the RTC.
-
Chrony adjusts the system clock at run time. Setting the RTC works
differently. So how/when does chrony set the RTC also known as
hardware clock?
When we reboot, chrony figures how much off accurate time our built-in
RTC is and adjusts accordingly. This requires a modification of some
settings. In the first place, the principal reason that chrony was
written was to adjust the RTC which time had then been used to set the
system clock.
Now, as we already read above, those two clocks can be seen as two
independent clocks on our system (in case we are running Linux)
whereas time can be copied back and forth among those two.
In order to allow chrony to not just correct the system clock at
run time but also to inject the accurate time into the RTC, we need to
ensure no other program than chrony mucks around with the RTC. There
is only one program that touches the RTC next to chrony... hwclock
that is. We want chronyd to exclusively set the RTC's time and we do
not want hwclock to come along behind chronyd and muck things up.
What we need to do is to prohibit hwclock to set RTC's time. Since
hwclock sets the RTC at system shutdown, disabling the part of
shutdown where hwclock saves the system time to the RTC does the
trick.
I am not going into details about /etc/init.d/hwclockfirst.sh and
/etc/init.d/hwclock.sh since anyone can take a look at them for
himself. The only important thing for us to know is that the following
does what we want i.e. disabling hwclock:
 1  sa@sub:~$ cd /etc/default/
 2  sa@sub:/etc/default$ type pi
 3  pi is aliased to `ls -la | grep'
 4  sa@sub:/etc/default$ pi rcS
 5  -rw-r--r--   1 root root   282 2008-05-19 14:15 rcS
 6  sa@sub:/etc/default$ su
 7  Password:
 8  sub:/etc/default# cp rcS{,_old}
 9  sub:/etc/default# echo "HWCLOCKACCESS=no" >> rcS
10  sub:/etc/default# diff -u rcS_old rcS
11  --- rcS_old     2008-09-27 21:24:12.000000000 +0200
12  +++ rcS 2008-09-27 21:24:36.000000000 +0200
13  @@ -15,3 +15,4 @@
14   FSCKFIX=no
15   RAMRUN=no
16   RAMLOCK=no
17  +HWCLOCKACCESS=no
18  sub:/etc/default# exit
19  exit
20  sa@sub:/etc/default$ pi rcS
21  -rw-r--r--   1 root root   299 2008-09-27 21:24 rcS
22  -rw-r--r--   1 root root   282 2008-09-27 21:24 rcS_old
23  sa@sub:/etc/default$ cat rcS
24  #
25  # /etc/default/rcS
26  #
27  # Default settings for the scripts in /etc/rcS.d/
28  #
29  # For information about these variables see the rcS(5) manual page.
30  #
31  # This file belongs to the "initscripts" package.
32
33  TMPTIME=0
34  SULOGIN=no
35  DELAYLOGIN=no
36  UTC=yes
37  VERBOSE=no
38  FSCKFIX=no
39  RAMRUN=no
40  RAMLOCK=no
41  HWCLOCKACCESS=no
42  sa@sub:/etc/default$
The command from line 4 is just one of my numerous aliases in my
.bashrc. As can be seen, the command from line 9 is the important one.
The result can be seen in lines 17 and 41 respectively.
After a reboot, using hwclock does not work anymore i.e. is not
allowed anymore since we disabled it
sa@sub:~$ su
Password:
sub:/home/sa# hwclock
Cannot access the Hardware Clock via any known method.
Use the --debug option to see the details of our search for an access method.
sub:/home/sa# exit
exit
sa@sub:~$
Reload Sample Histories and Long-term averaging of Gains and Loss for the RTC
Now we want to leverage the fact that chrony memorizes differences in
time between the accurate time it gets over the Internet and the
measurements from the RTC — this is then used to calculate a drift
i.e. long-term gains or losses.
The below changes to /etc/init.d/chrony ensures chronyd reloads the
time samples for the NTP serves in use plus, on reboot, it sets the
system clock from the RTC's time, thereby using the samples to
calculate the exact drift in order to correct system as well as RTC
time.
sa@sub:~$ su
Password:
sub:/home/sa# cp /etc/init.d/chrony{,_orig}
sub:/home/sa# echo "here we make our changes..."
here we make our changes...
sub:/home/sa# diff -u /etc/init.d/chrony{_orig,}
--- /etc/init.d/chrony_orig     2008-10-01 12:46:52.000000000 +0200
+++ /etc/init.d/chrony  2008-10-01 12:52:10.000000000 +0200
@@ -29,7 +29,7 @@

 case "$1" in
   start)
-    start-stop-daemon --start --verbose --exec $DAEMON
+    start-stop-daemon --start --verbose --exec $DAEMON -- -r -s
     sleep 1
     netstat -r 2>/dev/null | grep -q default && /etc/ppp/ip-up.d/chrony > /dev/null || true
     ;;
@@ -45,7 +45,7 @@
         echo -n "Restarting $DESC: "
         start-stop-daemon --stop --quiet --exec $DAEMON
         sleep 1
-        start-stop-daemon --start --quiet --exec $DAEMON -- -r
+        start-stop-daemon --start --quiet --exec $DAEMON -- -r -s
         sleep 1
         netstat -r 2>/dev/null | grep -q default && /etc/ppp/ip-up.d/chrony > /dev/null || true
         echo "$NAME."
sub:/home/sa#
In order for the above to work, there must be settings made within
/etc/chrony/chrony.conf if not already in place.
sa@sub:~$ type gr
gr is aliased to `grep -rni --color'
sa@sub:~$ gr dumponexit /etc/chrony/chrony.conf
51:dumponexit
sa@sub:~$ gr rtcfile /etc/chrony/chrony.conf
83:rtcfile /var/lib/chrony/chrony.rtc
sa@sub:~$
dumponexit is set per default with Debian's chrony package so we do
not need to do anything. The same is true for the file which stores
RTC values — one of the files chrony needs in order to function
properly.
In addition, if someone is on a dial-up connection to the Internet
(e.g. the hut in the woods might not have broadband or any other means
of connectivity available), it is a good idea to correct the RTC and
save time measurements (i.e. drift calculations) as soon as we — or
better said, the modem actually — log off.
That way we reduce the odds of a power failure preventing chrony from
writing the RTC data for our next boot (it can recover from this error
with the previous boot's RTC adjustment). The file and the actual
changes (lines 12 to 14) needed can be seen below.
 1  sa@sub:~$ su
 2  Password:
 3  sub:/home/sa# cp /etc/ppp/ip-down.d/chrony{,_orig}
 4  sub:/home/sa# cd /etc/ppp/ip-down.d/
 5  sub:/etc/ppp/ip-down.d# diff -u chrony_orig chrony
 6  --- chrony_orig 2008-10-03 11:36:17.000000000 +0200
 7  +++ chrony      2008-10-03 11:36:53.000000000 +0200
 8  @@ -12,6 +12,9 @@
 9   PASSWORD=`awk '$1 ~ /^'$KEY'$/ {print $2; exit}' /etc/chrony/chrony.keys`
10   /usr/bin/chronyc << EOF
11   password $PASSWORD
12  +trimrtc
13  +writertc
14  +dump
15   offline
16   EOF
17   rm -f /var/run/chrony-ppp-up
18  sub:/etc/ppp/ip-down.d#
Configuration - Chrony in Client / Server Setup
-
Will be written when I have to set up such setup again in the future
... actually it is pretty much the same as for the standalone setup
... only need the clients be configured to pool the master which
itself need to use
local to appear as master to other machines on the
LAN; the rest, all the same as standalone...
Maintaining Chrony
Now that we are done installing and setting up chrony, we can play
around a bit more in order to understand the whole subject better.
This section is also good to get a notion of how to maintain accurate
time and thus chrony.
activity
This command reports the number of servers/peers that are online and
offline. If the auto_offline option is used in specifying some of the
servers/peers, the activity command may be useful for detecting when
all of them have entered the offline state after the PPP link has been
disconnected. An example can be seen below
sub:/home/sa# chronyc activity
200 OK
0 sources online
4 sources offline
0 sources doing burst (return to online)
0 sources doing burst (return to offline)
sub:/home/sa#
The report shows the number of servers/peers in 4 states:
online: the server/peer is currently online (i.e. assumed by
chronyd to be reachable)offline: the server/peer is currently offline (i.e. assumed by
chronyd to be unreachable, and no measurements from it will be
attempted.)burst_on-line: a burst command has been initiated for the
server/peer and is being performed; after the burst is complete,
the server/peer will be returned to the online state.burst_offline: a burst command has been initiated for the
server/peer and is being performed; after the burst is complete,
the server/peer will be returned to the offline state.
rtcdata
The rtcdata command displays the current RTC parameters. An example
output is shown below (twice actuall, at first without and secondly
with using the chronyc interpreter; it makes no difference which way
we do it)
sub:/home/sa#  chronyc rtcdata
RTC ref time (UTC) : Fri Oct  3 13:14:07 2008
Number of samples  : 17
Number of runs     : 10
Sample span period :  64m
RTC is fast by     :    -2.358017 seconds
RTC gains time at  :   -38.281 ppm
sub:/home/sa# chronyc
chrony version 1.23, copyright (C) 1997-2002 Richard P. Curnow
chrony comes with ABSOLUTELY NO WARRANTY.
This is free software, and you are welcome to redistribute it
under certain conditions.
See the GNU General Public License version 2 for details.

chronyc> rtcdata
RTC ref time (UTC) : Fri Oct  3 13:14:07 2008
Number of samples  : 17
Number of runs     : 10
Sample span period :  64m
RTC is fast by     :    -2.358017 seconds
RTC gains time at  :   -38.281 ppm
chronyc> exit
sub:/home/sa#
- RTC ref time (GMT)
-
This is the RTC reading the last time its error was measured.
- Number of samples
-
This is the number of previous measurements being used to determine
the RTC gain/loss rate.
- Number of runs
-
This is the number of runs of residuals of the same sign following the
regression fit for the RTC error versus RTC time. A value which is
small indicates that the measurements are not well approximated by a
linear model, and that the algorithm will tend to delete the older
measurements to improve the fit.
- Sample span period
-
This is the period that the measurements span (from the oldest to the
newest). Without a unit the value is in seconds; suffixes
m for
minutes, h for hours, d for days or y for years may be used.
- RTC is fast by
-
This is the estimate of how many seconds fast the RTC would be when it
thought the time was at the reference time. If this value is large, we
may want to use the
trimrtc command to bring the RTC into line with
the system clock. Note, a large error will not affect chronyd 's
operation, unless it becomes so big as to start causing rounding
errors.
- RTC gains time at
-
This is the amount of time gained (positive) or lost (negative) by the
RTC (Real-time Clock) for each second that it ticks. It is measured in
ppm (parts per million) i.e. microseconds. So if the value shown was
+1, suppose the RTC was exactly right when it crosses a particular
second boundary, then it would be 1 microsecond fast when it crosses
its next second boundary.
sources
This command displays information about the current time sources that
chronyd is accessing. I provided an example below. The optional
argument -v can be specified, meaning verbose. In this case, extra
caption lines are shown as a reminder of the meanings of the columns.
sub:/home/sa# chronyc
chrony version 1.23, copyright (C) 1997-2002 Richard P. Curnow
chrony comes with ABSOLUTELY NO WARRANTY.
This is free software, and you are welcome to redistribute it
under certain conditions.
See the GNU General Public License version 2 for details.

chronyc> sources -v
210 Number of sources = 4

  .-- Source mode  '^' = server, '=' = peer, '#' = local clock.
 / .- Source state '*' = current synced, '+' = OK for sync, '?' = unreachable,
| /                'x' = time may be in error, '~' = time is too variable.
||                                                 .- xxxx [ yyyy ] +/- zzzz
||                                                /   xxxx = adjusted offset,
||         Log2(Polling interval) -.             |    yyyy = measured offset,
||                                  \            |    zzzz = estimated error.
||                                   |           |
MS Name/IP address           Stratum Poll LastRx Last sample
============================================================================
^+ rainbow.bksys.at              2    8     8d  +7158us[  +11ms] +/-   83ms
^+ hopfen.linux-kernel.at        3    8    32h  +5856us[+6499us] +/-   79ms
^+ mail.kaltenbach-edv.at        3    8    32h    +18ms[  +13ms] +/-   29ms
^+ portal1.theaterservice.at     2    8    32h   +498us[+1244us] +/-  100ms
chronyc> exit
sub:/home/sa#
Although we used the -v option, here is a bit more of explanation i.e.
the columns are as follows:
- M
-
This indicates the mode of the source.
^ means a server, = means a
peer and # indicates a locally connected reference clock1.
- S
-
This column indicates the state of the sources.
* indicates the source
to which chronyd is current synchronised. + indicates other acceptable
sources. ? indicates sources to which connectivity has been lost. x
indicates a clock which chronyd thinks is a falseticker (i.e. its time
is inconsistent with a majority of other sources). ~ indicates a
source whose time appears to have too much variability. The ~
condition is also shown at start-up, until at least 3 samples have
been gathered from it.
- Name/IP address
-
This shows the name or the IP address of the source.
- Stratum
-
This shows the stratum of the source, as reported in its most recently
received sample. Stratum 1 indicates a computer with a locally
attached reference clock. A computer that is synchronised to a stratum
1 computer is at stratum 2. A computer that is synchronised to a
stratum 2 computer is at stratum 3, and so on.
- Poll
-
This shows the rate at which the source is being polled, as a base-2
logarithm of the interval in seconds. Thus, a value of 6 would
indicate that a measurement is being made every 64 seconds.
-
chronyd automatically varies the polling rate in response to
prevailing conditions.
- LastRx
-
This column shows how long ago the last sample was received from the
source. This is normally in seconds. The letters
m, h, d or y indicate
minutes, hours, days or years.
- Last sample
-
This column shows the offset between the local clock and the source at
the last measurement. The number in the square brackets shows the
actual measured offset. This may be suffixed by
us (indicating
microseconds), ms (indicating milliseconds), or s (indicating
seconds).
-
The number to the left of the square brackets shows the original
measurement, adjusted to allow for any slews applied to the local
clock since. The number following the +/- indicator shows the margin
of error in the measurement. Positive offsets indicate that the local
clock is fast of the source.
sourcestats
The sourcestats command displays information about the drift rate and
offset estimation process for each of the sources currently being
examined by chronyd. The optional argument -v can be specified,
meaning verbose. In this case, extra caption lines are shown as a
reminder of the meanings of the columns as can be seen with the
example below.
sub:/home/sa# chronyc sourcestats -v
210 Number of sources = 4
                             .- Number of sample points in measurement set.
                            /    .- Number of residual runs with same sign.
                           |    /    .- Length of measurement set (time).
                           |   |    /      .- Est. clock freq error (ppm).
                           |   |   |      /            .- Est error in freq.
                           |   |   |     |            /            .- On the
                           |   |   |     |           |            /   samples.
                           |   |   |     |           |           |
Name/IP Address            NP  NR  Span  Frequency   Freq Skew   Std Dev
========================================================================
rainbow.bksys.at            7   3   961      -5.023      79.534    10ms
hopfen.linux-kernel.at     13   6   72m       1.494       5.186  4952us
mail.kaltenbach-edv.at     13   5   10h     -16.715       3.389    37ms
portal1.theaterservice.at   7   3   42m       0.075       5.507  1890us
sub:/home/sa#
- Name/IP Address
-
This is the name or dotted-quad IP address of the NTP server (or peer)
to which the rest of the line relates.
- NP
-
This is the number of sample points currently being retained for the
server. The drift rate and current offset are estimated by performing
a linear regression through these points.
- NR
-
This is the number of runs of residuals having the same sign following
the last regression. If this number starts to become too small
relative to the number of samples, it indicates that a straight line
is no longer a good fit to the data. If the number of runs is too low,
chronyd discards older samples and re-runs the regression until the
number of runs becomes acceptable.
- Span
-
This is the interval between the oldest and newest samples. If no unit
is shown the value is in seconds. The suffixes are the same as for the
other examples before e.g.
m determines minutes, h hours and so forth.
- Frequency
-
This is the estimated residual frequency for the server, in ppm (parts
per million). For example, with the first server
-5.023 * 10^-6 that
determines that the computer's system clock is estimated to be running
~5 parts in a million to slow relative to the server.
- Freq Skew
-
This is the estimated error bounds on Freq (again in parts per
million).
- Std Dev
-
This is the estimated sample standard deviation.
tracking
The tracking command displays parameters about the system's clock
performance.
sub:/home/sa# chronyc tracking
Reference ID    : 127.127.1.1 (127.127.1.1)
Stratum         : 10
Ref time (UTC)  : Fri Oct  3 15:53:48 2008
System time     : 0.000000 seconds fast of NTP time
Frequency       : 76.417 ppm slow
Residual freq   : 0.000 ppm
Skew            : 0.000 ppm
Root delay      : 0.000000 seconds
Root dispersion : 0.007812 seconds
sub:/home/sa#
- Reference ID
-
This is the IP address, and name if available, of the server to which
the computer is currently synchronized. If this is
127.127.1.1 it
means the computer is not synchronized to any external source and that
we have the local mode operating (via the local command in chronyc
(see local command), or the local directive in /etc/chrony.conf.
- Stratum
-
The stratum indicates how many hops away from a computer with an
attached reference clock we are. Such a computer is a stratum-1
computer, so the computer in the example is 10 hops away.
-
However, that might not be true since if connected to a local NTP
server running
chronyd, even if this NTP server would be a stratum-2,
would the client show stratum 10. This is the default setting with
chrony; more details on that matter can be found by reading about the
local directive.
- Ref time
-
This is the time (GMT) at which the last measurement from the
reference source was processed.
- System time
-
In normal operation,
chronyd never steps the system clock, because any
jump in the timescale can have adverse consequences for certain
application programs. Instead, any error in the system clock is
corrected by slightly speeding up or slowing down the system clock
until the error has been removed, and then returning to the system
clock's normal speed.
-
A consequence of this is that there will be a period when the system
clock (as read by other programs using the
gettimeofday() system call,
or by the date command in the shell) will be different from chronyd 's
estimate of the current true/accurate time (which it reports to NTP
clients when it is operating in server mode). The value reported on
this line is the difference due to this effect.
-
On systems such as Solaris and SunOS,
chronyd has no means to adjust
the fundamental rate of the system clock, so keeps the system time
correct by periodically making offsets to it as though an error had
been measured. The build up of these offsets will be observed in this
report. On systems such as Linux where chronyd can adjust the
fundamental rate of the system clock, this value will show zero unless
a very recent measurement has shown the system to be error.
- Frequency
-
The frequency is the rate by which the system's clock would be if
chronyd was not correcting it. It is expressed in ppm (parts per
million). For example, a value of 1ppm would mean that when the
system's clock thinks it has advanced 1 second, it has actually
advanced by 1.000001 seconds relative to true time.
-
As we can see in the example, the clock in my subnotebook is not a
very good one — it gains about 7 seconds per day.
- Residual freq
-
This shows the residual frequency for the currently selected reference
source. This reflects any difference between what the measurements
from the reference source indicate the frequency should be and the
frequency currently being used.
-
The reason this is not always zero is that a smoothing procedure is
applied to the frequency. Each time a measurement from the reference
source is obtained and a new residual frequency computed, the
estimated accuracy of this residual is compared with the estimated
accuracy of the existing frequency value (see skew). A weighted
average is computed for the new frequency, with weights depending on
these accuracies. If the measurements from the reference source follow
a consistent trend, the residual will be driven to zero over time.
- Skew
-
This is the estimated error bound on the frequency.
- Root delay
-
This is the total of the network path delays to the stratum-1 computer
from which the computer is ultimately synchronized.
-
In certain extreme situations, this value can be negative. This can
arise in a symmetric peer arrangement where the computer's frequencies
are not tracking each other and the network delay is very short
relative to the turn-around time at each computer.
- Root dispersion
-
This is the total dispersion accumulated through all the computers
back to the stratum-1 computer from which the computer is ultimately
synchronized. Dispersion is due to system clock resolution,
statistical measurement variations etc.
-
An absolute bound on the computer's clock accuracy (assuming the
stratum-1 computer is correct) is given by
clock_error <= root_dispersion + (0.5 * |root_delay|).
Incron
Examples
Please go here for more information.
|


